
Flutter Hover Effects - The Definitive Guide.
Dec 11, 2020
I’ve been sharing a few hover effects built using Flutter on Twitter over the last few days. Quite a few people said they would like to know how they work, so I decided to write a quick article explaining just that.
Some of them may look complex, but under the hood, they all work the same way. In fact, they’re not as special as they may seem.
The secret sauce lies not in the animations, but in how the mouse is used to animate the widgets. This article will discuss just that.
Detecting the mouse
As far as I know, there are two widgets of varying complexity, which can be used to detect a mouse hovering over the UI. The InkWell and the MouseRegion. These two widgets provide everything you need to create any hover effect you need to create Flutter hover effects.
Let’s start with the InkWell. The InkWell comes with a handy callback called onHover which will be triggered whenever the mouse hovers above its child. This callback provides a boolean, which tells us whether it is being hovered over or not.
Take the following example:
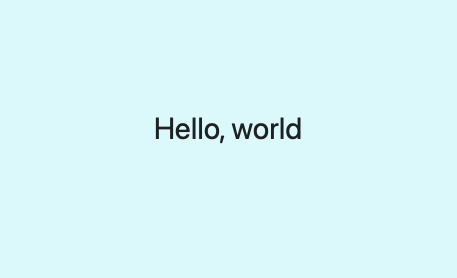
In this example, whenever the mouse hovers over the Text, “Hello World”, true will be printed to the console, and when it leaves, it prints false.
Using this, we can tell our UI whether the mouse is hovering or not. Using this mix, combined with implicit animations, we are instantly granted access to an infinite amount of possibilities.

Behold! The hover button.
Warning! This InkWell will not detect hover events if the onTap property or similar is null.
You can also use these triggers for explicit animations. All you need is an AnimationController. If the mouse is hovering, move the animation forward, and if it’s not, reverse.
That is exactly how my City Cards demo works:
Using the mouse position
For most use cases, the InkWell may be all you need to create any Hover Effect. But what if you wanted to know where the mouse is on the screen? Or where the mouse is relative to a widget.
Enter the MouseRegion. The MouseRegion is like an InkWell on steroids (in the context of hovering at least). It does not only tell you if the mouse is hovering or not. It can also tell you when it enters, or exits. It can give you the mouse’s position on the screen (position), as well as its position relative to its child (localPosition).
Let’s take two examples that will show you how it can be used.
The Pointer
I babbled a lot about pointers in this article, but I never really talked about how to actually create a custom cursor.
To make it, wrap your widgets in a MouseRegion. This MouseRegion will update a variable offset with every new pointer event.
Now we can use that offset to translate a pointer in a Stack.
The full code should look like this:

Simple pointer
There are many things you can do to make the animation look even better.
For example, you can use the AnimatedPositioned widget to make it animate smoothly, as well as delay the animation, as seen in this demo:
Check out the code!
Side Note: If you want to learn how to blend widgets as seen in the above video, check out this article.
BONUS TIP! If you would like to hide the cursor, the MouseRegion comes with a cursor property (InkWell has mouseCursor). Just pass in SystemMouseCursors.none. Check out the other SystemMouseCursors for more custom cursors.
Getting relative mouse positions
By relative mouse position, I mean a value extrapolated by comparing the mouse position to the size of its bounds. Let’s say our screen was 1000 pixels wide. Using the middle as a reference point, 0 pixels (beginning) would be represented as -1 and 1000 pixels (end) would be represented by 1, while the center would be represented by 0. Let’s call that value our relativeDx.

You may wonder why the heck you would need this.
I’ve found this approach especially useful when building parallax animations. To get our desired rotation/skew, all we need to is multiply our offset by the reference value (relativeDx). Take this example:
When our relativeDx is 0 (the mouse is in the middle), the container will not rotate at all. When it’s at -1 it will rotate towards the left, and when it’s at 1 it will rotate towards the right.
Let’s say we wanted to take our screen width as a reference point. Given that our mouse position on the horizontal is mousePositionDx, take a look at this snippet.
This will yield -1 when the mouse is at the beginning of the screen and 1 when it is at the end.
The same can be applied to get the relative vertical position.
I use this technique in this demo:
For more examples of hover effects, check out my hover effect gallery on Github.